Lolly Sticks

Another day, another video of a rather lame mock uploaded to YouTube. We’re back to 4:3 again, and a short video a did to teach myself how to use Adobe Premiere Elements:

Before I bought Premiere Elements in early 2008 I’d never done any video editing before, so it was all very new to me. I did huge a number of videos to experiment and work out a good workflow to transfer my material from Flash or Fireworks to video. I recorded my work over and over again onto the same DVD-RW and then scuttled downstairs to the television to see how the results looked on a CRT television rather than an LCD monitor. As you can see from this video, I hadn’t yet worked out things like interlacing or how to age transparencies properly.

Although the first BBC 1 globe symbol I remember from my childhood was the black and cyan version with the italic “COLOUR” lettering, the first BBC 2 symbol I remember was the striped cylindrical 2. I saw this countless times waiting for Play School on weekday mornings or Play Away – the strange oasis that appeared between boring black and white films – on Saturdays. BBC 1 and ITV were showing wall to wall sport at the time due to their regulatory obligation to provide programming for the hard of thinking. Channel Four didn’t even exist. Play School mornings were usually accompanied by a cup of Mellow Birds made with milk. Despite being Julie Steven’s favourite beverage, it never seemed to dissolve properly back then, so you’d get little brown bits on the top…

When the computer generated ==2== symbol replaced the cylinder on BBC 2, I never really took to it. The cylinder’s animation was far more interesting, so I often wondered what would have happened if the stripey cylindrical 2 had been kept but updated. The end result, my “lolly sticks” symbol was created in Swift 3D. The animation does a very similar thing to the cylinder – the coloured stripes rotate in opposite directions – but to make it more interesting the camera does a 270 degree trip around the stripes as they do so.

Swift 3D – click to enlarge

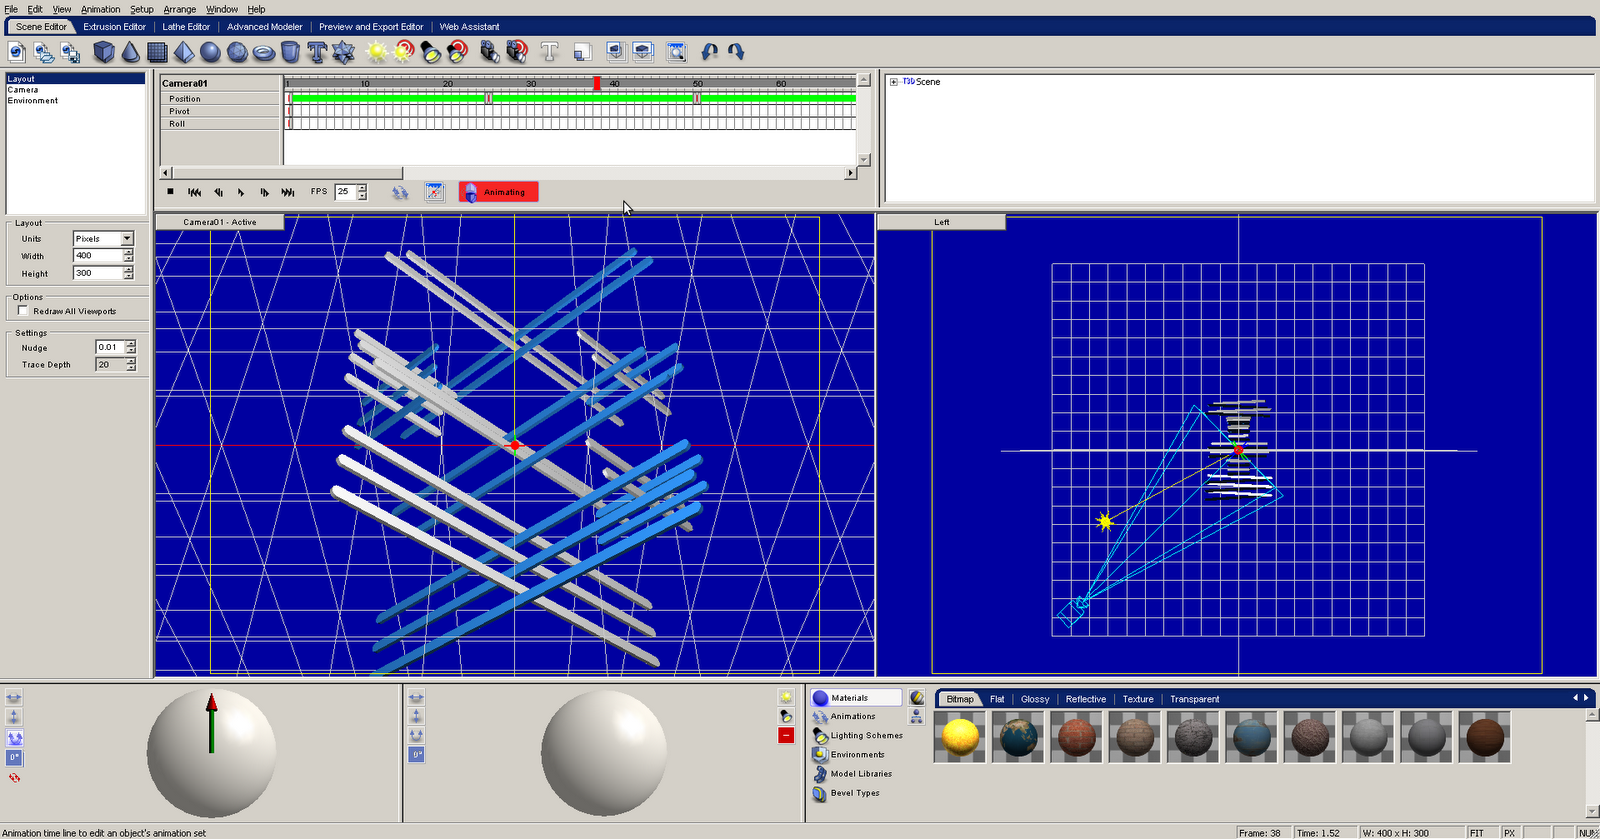
One interesting thing about the lolly sticks symbol is that I created it at 400 x 300 in Swift 3D. As I was exporting it in vector format as a .swf it didn’t matter what size it was so long as the aspect ratio was 4:3. Vector 3D is something that Swift 3D really excels at, although it’s very good at raster 3D as well. After more experimentation I’d later scrub this approach in favour of working at 720 x 576 and correcting in advance in Swift 3D itself for non-square PAL pixels.

Thin hairline 2 in Flash

To get the striped 2 into Swift 3D in the first place, I drew it in Macromedia Flash 8. I drew it as a series of hairlines, and then turned the hairlines into thick rounded strokes.

 Exactly the same graphic, stroked in Inkscape

After doing this, I turned the strokes into fills, and exported the resulting graphic as an Adobe Illustrator file for importing into Swift 3D.

GNAT Flash – Click to Enlarge

The clock is my Macromedia Flash 8 version of BBC Engineer Richard Russell’s computer originated GNAT (Generator, Network Analogue Time) clocks. The GNATs were used by BBC 1 and BBC 2 throughout the 1980s. There was even a rather nice yellow and blue Open University version for a few years. You can download a screensaver created using the final version of the GNAT software from Richard’s site. Richard has also written an article that discusses the history of the GNAT.

Teacher’s discipline problem #5435 – POW!!!!!!!!

The schools dots is again another one of my Flash 8 concoctions. This is the second version, where I finally got the font right! This, along with the clock, is the sort of animation that’s very easy to do in Actionscript, but a real pain to produce a version you can export to use in video projects.

Henry Woolf was even better with Charlie than with Pinter

The slide was based on a BBC1 version I did around ten years ago now for the sadly soon to be defunct BBC Cult website. I simply traced a screen capture in Flash that the BBC supplied to me from the opening titles of the programme “Words and Pictures”.

My treatment of the slide was very unsatisfactory – both in terms of the fading and blurring I used and the very bad banding that appears on the image. It looks very fake indeed, and one day I must get round to writing a post about how I would have gone about doing that job properly.

Just a note about the font – when I’m doing 70s stuff that requires Helvetica I tend to use URW++ Nimbus Sans these days. I’ll explain why in a post about Thames Television some other time.

The music is from one of my favourite programmes – 4Square – and was composed by Ian McKim. The music was designed as a tension bed underneath a computer generated (Acorn Archimedes) maze game and made for a very exciting minute of television.

Anyway, technically a rather unaccomplished little video of another lame mock. But it brings back lot of memories and I enjoy watching it from time to time.

Starting Science credits

Here are the finished filmised “Starting Science” credits, which I discussed in my previous post here.

After animation was created in Macromedia Flash 8:
  • the .swf was loaded into Premiere Elements 4.0,
  • gate weave was added using the Active Camera filter,
  • the video was exported from Premiere Elements as an .avi using the HuffyUV codec
  • then imported into VirtualDub
  • the VirtualDub blur filter was added
  • the MSU Noise Generator filter was added
  • the MSU Old Cinema filter was added
  • the video was exported from VirtualDub as an .avi using the HuffyUV codec
  • the video was turned into a .flv using the Flash Video Encoder (OnVP6 codec)
  • the video was uploaded to YouTube.

The credits are silent, as I don’t want to upset Ron Geesin, but with music it’s fantastic!

Film on a budget

I have done a lot of Adobe Flash animations of television graphics from the 50s, 60s, 70s and 80s. I have also just bought a copy of Adobe Premiere Elements 4.0, so I can experiment with video editing. I am really happy with Premiere Elements. In fact, there is only one thing I cannot do with it: make my graphics look like they are on film.


Stuart Kettle’s Starting Science robot, which I created from scratch in Flash, then filmised in VirtualDub. Click on it for a better look.

Television graphics in the 70s were often broadcast from 16mm colour film. Graphics on film have a special “look”:

  • colours change
  • edges become softer
  • you may see dust or scratches
  • the picture may bob up and down or look grainy

Input video from Flash (encoded with Huffyuv) on the left, VirtualDub output on the right. Using VirtualDub filters means I can work with colours which are not “video safe” or sharp edges in Flash and not worry about how they will look.

If you want to make video look like old film, there are expensive plug-ins available that do a fantastic job. I can’t afford them, and I don’t like using cracked software. Most video editing programs come with a free old film plug in. I tried Adobe Premiere Elements’ free “Old Film” plug-in. It was rubbish! So I needed to find another way – one that was cheap.

Before you start, you need some video. To get animations out of Flash and into a video format I use a codec called “HuffyUV” – it’s a free lossless video compression codec. After you install it, you can export an avi from Flash using the “Export Movie” option in the File menu and select HuffyUV as the codec.

Don’t forget to make sure the Flash Files are 720 x 576 at 25fps for PAL. I do my animations in a symbol that is 788 x 576 for PAL 4:3 or 1050 x 576 for PAL 16:9. I then squash the animations on the main stage for export horizontally to 720 x 576.

To get video out of Premiere Elements 4.0 to filmise it I also use HuffYUV. The DV format that Adobe suggests you use to export video you want to put back into Premiere Elements is no good for this job. It is very compact, but it will cause all sorts of nasty colour bleeding and make your end result look like a nasty VHS recording done somewhere with poor reception. To export a video as an .avi with HuffYUV from Premiere Elements you need to use “Export” from the File menu. Don’t forget to tweak the settings to export “Progressive” – you don’t need fields for film stuff!

Now we have some video we can filmise it. On the internet I found something called the MSU Old Cinema filter for a program called VirtualDub. I had never heard of either before, but I think they are both fantastic. Here’s what I do with them.

In the MSU Old Cinema filter, I always start by selecting the “Modern video with yellow shift” preset, and then clicking on “Advanced”. This lets me play with all the filter’s settings.

In the “Settings” group I always uncheck all the boxes apart from “Show Noise” and “Random Noise On Screen”. This will give you “speckle” and “sparkle”. “Speckle” are bits of dirt on the film, which appear as black dots. In the 1970s film was broadcast that was covered in dirt! If the dirt was on the negative, then it would appear white on screen – this is “sparkle”. I never touch any other filter setting now apart from the Colour Correction.

I have a lot of off-air recordings of television from the 1970s. I have found the 16mm film on them suffered from something called “Yellow Shift”. This means that blue has faded much more than red and green, so you end up with slightly yellowy look with greyish blues. However, I have found the “Yellow Shift” Colour correction in the MSU Old Cinema filter doesn’t get this look quite right. In particular, it gets pinks wrong.

That means I usually use “Manual Linear” colour correction instead, and play with the colour sliders myself. To match the appearance of a 1979 print of the ATV colour zoom ident, I found Strength 60%, Red 186, Green 186, Blue 126 worked fine.

To get the look of a 1980 edition of ATV’s “Starting Science” then I found Strength 60%, Red, 102, Green 114, Blue 30 worked, but I needed the VirtualDub built-in Brightness and Contrast Filter too. I set the Brightness to +7 and left the Contrast at 100%.

For a really faded look, to match a 1975 edition of Granada’s “A Place To Live”, I found Strength 80%, Red 171, Green 107, Blue 42 worked well.

If the yellow cast is too strong or your footage looks too dark with these colour corrections you can reduce the Strength setting.

To make the film look “grainy”, I use another free VirtualDub filter. It’s called the MSU Noise Generator. Normal Distributed Noise with Y strength 3, Cb strength 3 and Cr strength 3 is a good start, but noise varies a lot from film to film.

If you add noise it not only makes your end result look more realistic – it can also hide defects in your source material. It is particularly good for breaking up gradient fills, which often look bad on video.

Film has softer edges than video, so it is important to soften the edges of anything you want to sell as film. To soften the edges I use the VirtualDub built-in “blur”” filter. However, you must make sure this appears before the other filters, so you don’t blur the grain or scratches.

If you are working in PAL 16:9, you can right click on the video input and output panes in VirtualDub to change view them at the correct aspect ratio.

To export the video from VirtualDub, I also use HuffyUV. If you press Ctrl-P you’ll be able to change the video compression method.

So we’ve got the grain, we’ve got the softness, we’ve got the faded colour and the speckle and sparkle and the scratches. All that’s left is the gate weave.

Gate weave is the gentle bobbing up and down that film used to do. The MSU Old Cinema filter and the Elements Old Film plug in both really overdo this effect. However, there is a way of getting a realistic gate weave effect. To do this I use the “Active Camera” plug in that comes with Premiere Elements 4. If you add this effect to a piece of video, changing the settings to Horizontal .33, Vertical 2.0, Crop 5, Rate 50, Jitter 75 is a good starting point.

The MSU Old Cinema filter is not a perfect solution – the number of speckle and sparkle artifacts it has is limited and they look rather small on screen. It cannot do things like “hair” trapped in the gate. And I have to add the marker that shows the film is coming to the end of a reel in Flash. It would also be good if there were adjustable settings for gate weave and flicker.

The MSU Noise Generation filter does not make a totally convincing film grain either – MSU have written a proper Film noise plug but it’s for its paying customers only.

However, this is the best “free” filmising solution I have found, and it can produce some very realistic results. Try it yourself!